
It describes the new Windows version, which is still in beta testing. Features, names and screenshots may change before release, and the test build may differ in places. All places in the beta test have been taken; as soon as the new version is released, you can download it from the CalcTape for Windows page.
Updated: 3 October 2026 · CalcTape 8.0.0 beta
CalcTape is a calculator that works like a paper tape with notes: instead of showing a single intermediate result, the whole calculation stays on screen. You write it line by line, comment every value and may correct anything later – everything below recalculates immediately.
Calculate, comment, correct.

What's new compared with CalcTape 6.0.8.1?
The new Windows version extends the previous release in these areas:
- More calculation options: Named values (variables) work above their definitions; rounding only totals, detecting number formats on paste and calculations with brackets (Pro, experimental) are also available. Named values (variables) · Number format · Calculations with brackets
- Calculation steps on the tape: Bracket values, intermediate results and base values stand behind their lines; colored fields show what belongs together. Calculation steps
- More output options: PDF and HTML carry the formatting; experimental Excel export (Pro) writes formulas that keep calculating. Output · Excel export
- An easier start: Insert example texts into a calculation or follow a tutorial step by step. Example texts · Tutorials
- A clearer tape: The current line, calculation lines, errors and selected calculation blocks are marked; headings and emphasis help you read it; spell checking is available when the system provides a suitable dictionary. Tape
- Find and replace: Search across open documents or a folder as well. Find and replace
- Tabs side by side without Pro: Several tabs can now be arranged in groups side by side in the freeware too. Documents and tabs
- Layout for each window size: Panels and bars can be arranged separately by width and height. Interface and arrangement
- Customizable bars: Choose the contents of the toolbar, status bar and classic ribbon. Toolbar and ribbon
- Your own keyboards: Adjust layouts, grids and keys. Keyboard and user keys
- New appearance options: Choose light and dark themes or zen mode. Appearance
- Import from CalcTape 6: Bring over settings, user keys and an existing licence at startup. Import and ribbon
1. The idea: how CalcTape calculates
An ordinary calculator forgets every step as soon as the next one arrives. CalcTape keeps it:
- Every line stays visible. The tape grows downwards, subtotals and totals stay in view.
- Every number may carry a comment. Whatever follows the number is text – "net price", "invoice Miller", whatever you like.
- Every line stays editable. Click into an old line, change the value – everything below is recalculated at once.
- The document can be saved as a file. Save it, print it, export it and carry on later.
A document can contain several calculations and text. You open, edit and close the document; saving it creates a file with a file name and location.
Quick start
Type two lines and finish with =:
 +      1,000.00 net price
 +         19.00% VAT
 ---------------
 =      1,190.00
That is all there is to it. Percentages, brackets, operator precedence and named values come with everyday use, but the core is this list of number, sign and comment.
2. The tape

Every line has three parts: the operator on the left, the number and the comment behind it. What you type decides the kind of line:
- A line starting with
+,-,*or/is a calculation line. - A line with text only is a comment line – good for headings.
- A line with
=closes a block and draws its total.
The current line has a tint and an accent marker on the left. Other markers at the left edge distinguish calculation lines and errors; line numbers start again in each calculation block. Clicking a total selects the whole block. Adjust line numbers and edge markers under Settings → Tape → Lines. On a line with an error, the tooltip shows the full error message, even when the message is cut off at the right edge.
An operator typed behind a number starts a new calculation line, even in the middle of the comment. Hold Alt while you type it (Option ⌥ on the Mac) and it stays in the comment as text, as in “rent + heating”. This works for +, -, * and /, on the main keyboard and on the numeric keypad.
On a phone and on a tablet the device's keyboard has no Alt key. While it is open, the result bar shows "+" in place of ABC. Tap it, and every operator you type stays in the comment as text. The switch goes out when you tap it again, press Enter or leave the line you typed in; closing the keyboard switches it off as well. Until the first operator, you can still move the caret to the spot in the comment. The first time you switch it on, a hint at the switch explains what it does.
Enter behind the last number of a calculation adds the divider and the total; where the total already stands, the caret jumps below it. Shift+Enter only inserts a new line. It never splits a number, a total or a divider: with the caret inside one, the new line opens below that line, below the total for a divider. At the end of the last number of a closed calculation the new line opens above the divider. The total under it is then an ordinary number until you type a number into the new line.
The line with the total shows = where the other lines carry their operator, and a negative total has its minus right in front of the number: = -52.00. PDF, HTML, Excel, printing and Copy document with formatting show the total the same way. Copying as text, Share as text and saving write it with its sign as the operator (- 52.00). Paste a calculation with such an = line, and CalcTape reads it back as the total; where the divider above it is missing, CalcTape inserts it.
Headings and emphasis
CalcTape understands a small selection of the markdown characters:
# Travel expenses, March
The **train fare** was *dearer* than planned.
+ 89.00 train ticket, ***without*** a seat
A text line starting with a hash is a heading and is shown in bold; several hashes (##, ###) work the same way, and the type is the same at every level. **bold** and *italic* apply in text lines and in the comment behind a number, ***both*** is bold and italic at once, and one emphasis may sit inside another (**bold with *italic* inside**). The underscore spelling __bold__ and _italic_ does the same, except inside a word: names like net_total are left alone. In the comment behind a number, type the star with Alt (Option ⌥ on the Mac, after "+" in the result bar on a phone or a tablet), because a bare star starts a new calculation line there; the underscores need nothing of the kind.
The characters are read in the prose of a line only: the whole text of a text line, and the comment behind the number. A star between blanks stays an operator, so 2 * 3 is not emphasised, and a comment that starts with # is no heading – headings exist at the start of a text line only.
The characters disappear from view while the caret is in another line. The moment it enters the line – or a selection reaches into it – they are back and can be edited. They are in the document either way: selecting, copying and saving take every character along, and Find sees the line as it was written.
With a suitable system dictionary, spell checking reads a word the way the tape shows it: over**due** is checked as one word, and a correction from the context menu leaves the stars in place.
Exporting to HTML, PDF and Excel, and printing, carry the emphasis along and leave the characters out: an export shows the text, not the syntax that produced it. The same goes for the calculation as plain text – Copy document, Share as text and the .txt file leave the characters out. A selected passage, on the other hand, is copied and dragged as written, with the characters: it is your text, and it should look the same when pasted.
Switching it off. If # or * mean something else in your texts – #4711 as an order number at the start of a line, say – turn the reading off under Settings → Tape → Headings and emphasis. Every character then stands as typed, on the tape as in exports and prints. The switch applies to every document, changes none of them, and can be turned back on at any time.
A few moves that make up everyday use:
- Subtotal: a blank line separates blocks; every block gets its own total.
- Percent:
+19%adds 19 % of the total above,-19%takes it off,*19%gives the percentage alone; a bare19%counts as+19%. - Delete a line: remove the whole line – the rest recalculates.
- Copy the result: a copy icon always appears to the left of each total and variable definition in place of the position number. It puts the value on the clipboard. With the counter hidden, the icon appears beside the result when you hover over its line. Clicking the bold total marks the whole calculation; the copy icon beside the marking puts it on the clipboard with all its lines.
- Add lines up: select a few lines and CalcTape adds them up. Rest the mouse pointer on the selection for a moment and the amount appears as a bubble; the Selection readout, which you can add to the status bar (section 9), shows it all the time. The selection may begin and end in the middle of a line, and every line brings its own operator along. With a total line inside it, or past 100 lines, the readout stays empty.
- Select past the edge: drag past the edge of the tape while selecting with the mouse, and the tape scrolls along, sideways as well as up and down; the further out the pointer, the faster. It scrolls the same way when you drag selected text to its edge.
- Paste from Excel: CalcTape pastes a single cell from Excel or another spreadsheet into the line at the caret, for instance as a comment behind an amount. Several cells in a column become lines of their own.
Calculation steps
Some lines carry smaller values behind them. They are not part of the document; they show how CalcTape puts the calculation together:
 +         44.00
 -         12.00
 +          7.00
 *          3.00  = 21.00
 ═══════════════
= 53.00- Intermediate result: CalcTape calculates multiplication before addition. In the example the
* 3applies to the 7 alone, and the value of that multiplication stands behind its line. It appears behind the last line of a multiplication, division or power that spans more than one line, with the sign it carries into the calculation:- 3and below it* 7show= -21.00. When the multiplication is the whole calculation, the total shows its value. - Bracket value: behind the close line of a bracket stands its value, such as
) = 7.00(section 8). - Base value: a percent line such as
+ 19%takes its percentage of the amount above it. When that amount comes from several lines, it stands as= 520.00behind the line before the percent line. When that line already shows a value of its own, the base value stands on the percent line:+ 19.00% of 520.00. - Arrow: an arrow stands in front of an amount a line contributes itself, such as the surcharge of a percent line (
→ +98.80).
The line holding the caret and selected lines show no intermediate results, bracket values or base values. When the mouse pointer moves over a bracket, a multiplication or a percent calculation, CalcTape shades it in color, together with the calculations it stands in. Inner fields move in by two characters, and all fields of a calculation end at the same right edge. Their three color steps come from the theme's accent color.
The round Calculation steps button above the paper opens a menu with three levels: Hidden shows no fields and none of these values (the arrows stay), As set follows the settings, Complete shows every field and every value all the time. You can drag the button to another place. Customize how calculation steps are displayed… in the same menu opens the settings: for Brackets, Multiplication and division and Percentages you set separately when the Shading appears and when the value does (Bracket value, Intermediate result, Base value): Never, On hover or Always. Out of the box the values always appear and the fields on hover. Show the calculation-steps switch on the tape and Block contrast (section 14) are there as well.
Printing and PDF show the calculation steps the way the tape looks without the mouse pointer: the values that currently appear, and the fields whose shading is set to Always. Copying, saving and the other exports leave intermediate results and base values out; copies take the bracket value along as ) = 7.00. The Comments first layout (section 8) shows no intermediate results and no base values. CalcTape shows the calculation steps in every edition.
3. Calculation modes and number format
CalcTape has three modes (switch with F5):
- Basic Calculator – the default: you type the calculation, the result appears below it.
- Adding Machine (Pro) – input follows the classic adding-machine tape. Without Pro, F5 alternates between Basic Calculator and Text Editor.
- Text Editor – the tape behaves like a simple editor with a fixed step width; good for lists that only calculate on the side. Nothing is calculated here, so the total rules appear as a plain
---------------line of dashes in the text – exactly the way they are saved and copied.
The number format is set independently: decimal places, rounding (none, totals only, results, everything), the decimal and thousands separator and the input style (standard or fixed decimals).
The indent sets how wide the number column is: with 10 and two decimal places, 99,999,999.99 fits, with a blank behind the operator. Every number keeps that blank, a negative total in front of its minus, so a number that fills the column exactly or is wider widens the column of its calculation, the lines between two empty lines: every value of that calculation moves right until they line up again, and its total rules grow longer. The other calculations keep their column, and once the wide number is gone, its calculation narrows again.
Both separators start out as the ones your system prescribes. The list offers point and comma, and for the thousands separator also space, apostrophe and “None” — which leaves the digits ungrouped. “Own character…” takes any character you like; CalcTape says so when one cannot serve, and previews a number in the two you chose. What you change applies to every document: the numbers already written are rewritten.
When you paste numbers from another source, CalcTape reads their separators too: in a document with a decimal point, 1.234,50 becomes 1234.50 and 4,55 becomes 4.55. Anything ambiguous, such as a lone 1,234, stays as it is, and so do dates and version numbers. Detect number format when pasting is on by default; the first paste that rewrites a number shows a one-time note with the rewritten value and a button that opens the setting (Settings › Calculation).
4. Named values (variables) and example texts
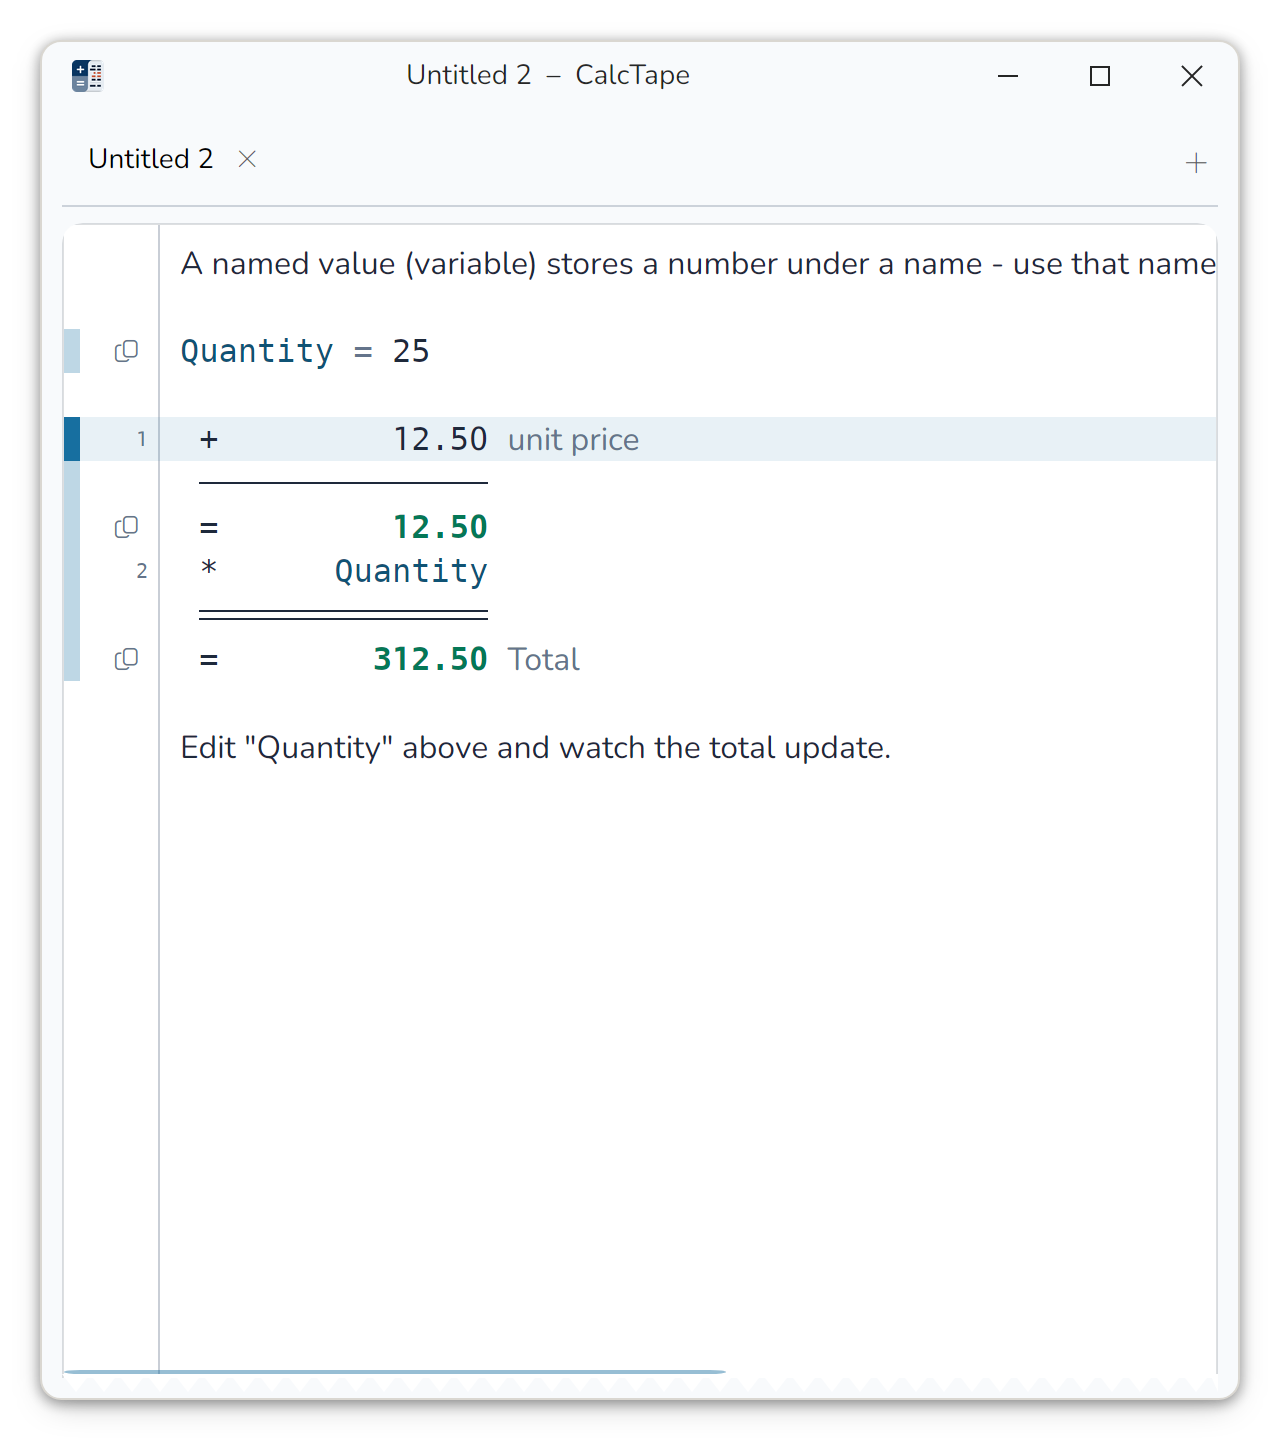
A value you need more than once gets a name:
Quantity = 25

 +         12.50 unit price
 *      Quantity
 ---------------
 =        312.50 Total
You can add a comment after a definition, such as HourlyRate = 65 per hour. With Proportional text font enabled under Settings → Tape, "per hour" uses proportional lettering. The name and calculation use the tape's fixed character width.
You can name a total too: type = name behind it, for instance = Total, and from then on it is a named value. While nothing follows the = yet, the line with the caret shows no error message, and neither does a definition whose value is still missing (Quantity =). Leave the line that way and the message appears.
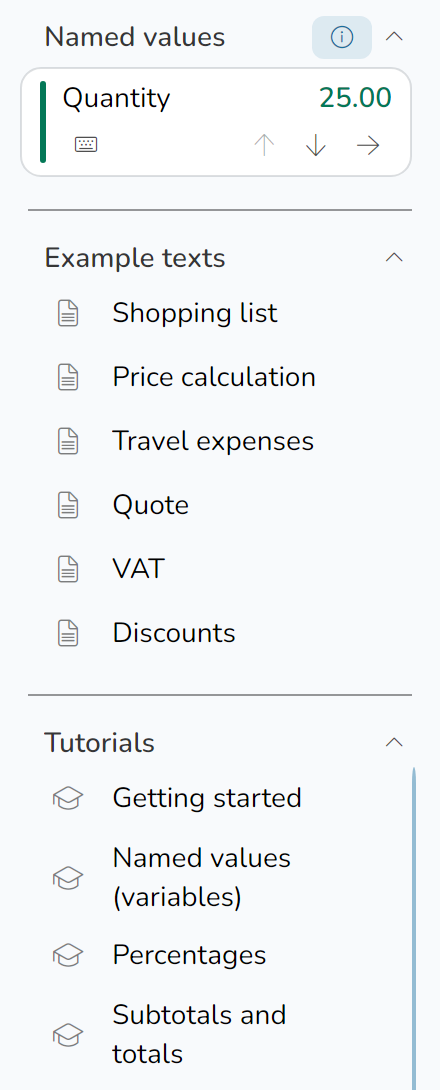
Change Quantity and every place that uses the name changes with it. The name may stand anywhere in the document, above its definition as well; there it needs an operator in front (+ Quantity). A line above the definition that starts with the name stays text, such as a heading "Quantity". A value that depends on itself, say through two definitions naming each other, is marked as a circular reference and has no value until the loop is broken. Ctrl+click on a name on the tape (⌘+click on the Mac) takes you to its definition; while you hold Ctrl, the pointer shows a hand over a name. Hover over a name on the tape to see its current value. The Values and texts panel lists all names of the document with their current value at the top. A click inserts the name at the caret; the arrows jump to its occurrences on the tape and to its definition. In a narrow list only the arrow to the definition remains, and the occurrences and the shortcut sit in the row's context menu. When values are present, the info icon beside the heading explains how to use the rows on demand.
The small pill under the name assigns a keyboard shortcut: it opens the list Ctrl+1 to Ctrl+0. A shortcut another value already holds shows that value's name next to it – pick it anyway and it moves to this value. Remove shortcut at the end of the list frees it again. The shortcut itself puts the name in at the caret, from wherever you are in the window.
The shortcut and the arrows show only at the information density Detailed, which CalcTape starts with. At Compact, name and value stand in one line, and the shortcut and the jumps sit in the value card's context menu (right-click, or hold the card). You switch it under Settings → Controls → Lists → Named values → Information density. The document lists have their own settings (section 5).
Below them are the example texts and the tutorials – the same ones the graduation hat Tutorials offers. The toolbar does not carry it out of the box, so add it there if you want it; in the classic ribbon it is under File → Help. An example text asks Where to insert? first – at the caret, at the start of the document or at its end – and then goes where you said in the open document. The example text's context menu offers these three destinations directly (right-click or hold the row). An empty line separates it from the rest of the document, and an empty line closes it, so both keep their own results and your next calculation below stands on its own. The caret then stands on the example's first calculation line, right behind the first number: change the value and watch everything below recalculate. A tutorial opens in a tab of its own that you simply close afterwards. That way the panel has something to offer even in a document without a single named value.
The example texts are named after what they contain (Shopping list, Price calculation, Travel expenses, Quote, VAT, Discounts – the last four are the example calculations of calctape.com and open with a heading, bold while Headings and emphasis is on, a plain title line otherwise), the tutorials after what they show: Getting started, Named values (variables), Percentages, Subtotals and totals, Comments, Rounding, Order of operations, Fixed decimals, Formulas in named values. Every tutorial highlights one number – change it and everything below is recalculated.
Where a tutorial is about a setting, its bar carries the Open setting button: it opens the settings right at the matching row. What you change there applies to the calculation next to it at once – and is put back as soon as you close the tutorial.
Which of the three sections the panel carries, and in which order, is yours to set, as with the library and the keyboard panel: under Settings → Controls → Contents of bars and panels → Values and texts, or with Customize panel “Values and texts”… in the panel's context menu. You may put separators between two sections there, as many as you like; a line at the start or the end of the list is not shown, because there it separates nothing. A flexible gap takes the room the sections do not need and pushes whatever follows it to the bottom edge. Out of the box the named values stand at the top, the flexible gap below them, and example texts and tutorials follow at the bottom edge, each behind a separator.
Each of the three sections scrolls on its own, and the three share the panel's height: a section that needs less takes only that much, and the others divide the rest evenly. The seam between two sections can be dragged with the mouse – to give the value list two thirds and the tutorials one third, say – and CalcTape remembers the ratio. A double-click on the seam divides evenly again, and so does Restore default in the editor. Here too the sections move by their heading, and a click on it folds and unfolds them.
Use + in the Documents heading to create a file in the displayed storage location. CalcTape asks for a name and selects an available suggestion such as “Untitled 1”. Enter or OK saves the empty file, opens it as a tab and immediately shows it in the list. Cancel creates nothing. An existing name produces a message in the dialog. The same applies to New in the toolbar, Ctrl+N, the menu and the + button beside the tabs.
5. Documents, worksheet and tabs
On desktop, launching CalcTape again uses the app that is already running. Files passed by double-clicking or Open with open there; documents already open are activated. A launch without a file brings up the main window and restores it if minimized. Your window manager may limit automatic foreground activation. If the running app cannot be reached, an error message appears; close its windows and try again.

In a document tab’s context menu, Close all others closes the other documents across all groups and windows. The clicked tab and the worksheet stay open. Unsaved changes are handled as when closing a single document; Cancel in a save prompt stops the operation.
CalcTape opens several documents side by side, each in its own tab.
The first tab is the worksheet: the scratch pad that comes up at start and is saved silently when you quit. It never asks – write whatever comes up. It cannot be closed, which is why it carries no ✕: it is always there when you need it. F4 brings it to the front, and so does the top entry behind the arrow next to the Open button, above the recently used files. Anything worth keeping goes into its own .calc file via Save as….
The library – the ☰ at the left end of the toolbar shows and hides it – carries several sections. Out of the box those are the worksheet, the Documents and Recently used, separated by lines, and, pushed to the bottom edge, Import documents, Backup / Restore, Settings and Info. Which sections it shows, and in which order, you arrange the way you arrange the toolbar: right-click the library → Customize library…, or Settings → Controls → Contents of bars and panels → Library; here too the offer can be filtered and grouped by category. ⓘ Help in the title bar opens the detailed explanation; the bar and other panel editors use the same control. Where the library stands and how it opens are set under Set up workspace (section 9): Docked as a column next to the tape, or Popover over the workspace, with its own Opening side. Clicking outside closes the popover. On phones and in narrow windows, ☰ opens a full-height drawer; the rest of the app stays blocked until you close it. Like every panel, the library gets a header only in layout mode (section 10); its ⋮ opens the same menu as the right-click.
The Documents section shows the documents of a folder and opens them with a click. The worksheet stands above it as a section of its own — it belongs to the app and lies in none of the folders — and is there even when it is not open as a tab right now. To choose the folder the document list shows, use Storage location in its header → Choose folder…, the command Default folder for documents (section 10) or Settings → Controls → Lists → Document list → Storage location.
Each row names the document without the .calc extension and, below it, when it was last changed: "Today, 12:36", "Yesterday, 20:36", within the last week the weekday ("Sunday, 15:36"), otherwise the date. Under Recently used the folder comes first ("docs · Yesterday, 20:36"). The row's tooltip gives the path and the size. The document of the active tab is highlighted: tinted, with an accent bar at the start of the row. In Documents and Recently used, a plain page outline marks a closed document; a filled page marks an open document, including one in another group or its own window. The worksheet always has a filled notepad icon. Sync states appear at the end of the row.
Each list has its own group under Settings → Controls → Lists: Document list (including the worksheet), Recently used, Named values, Example texts and Tutorials. Each group offers the settings that apply to its rows:
- Information density – detailed shows a document's date under its name and a value card's shortcut and arrows (section 4), compact the name alone and a value card's name and value in one line. Example texts and tutorials have no second line.
- Row style – List: rows flush against each other, highlighted with rounded corners; Pill: rows with air between them, highlighted with fully rounded ends; Card: every row a card of its own; Key: every row looks like a key of the keyboard, in the key style you set.
- Alternating rows – every second row of a list on a tinted ground, across the full width of the list. The Card and Key styles have none: there every row carries its own ground.
All three start on Automatic and follow the theme: every theme draws the lists detailed in the List style, and the Mac themes add alternating rows, the way the Mac app does. Only the named values start out as Card. You set the three separately for each list under Settings → Controls → Lists. The sort symbol in the document list's header changes its sort order and look; the look applies to the worksheet row as well. Row style and alternating rows are available directly on the Lists page. Right-click a list or one of its entries and choose “Row style” to go directly to its setting. With Card and Key, “Alternating rows” is disabled; its choice is kept for a later change of style. The action rows of the library – Import documents, Settings, Info and the others – always stay plain rows, and the lists in dialogs follow none of the three settings.
Reset to default (Lists) in the footer restores the sort order, storage location and appearance of all five lists to the active device preset. The button is disabled when those defaults apply. Documents stay in their current location.
The document list and Recently used share the library's height the way the sections of "Values and texts" do: the shorter list takes what it needs, the longer one the rest, and when both need more, each gets half. The seam between them can be dragged, and a double-click on it restores the even split; Restore default in the library's context menu puts the sections of the current height step and the split back together.
The sections can be arranged right in the library as well: take a heading or a row with the mouse and drag it to its new place – an accent line shows where it lands. A click on a list's heading folds it and unfolds it again: folded, only the heading remains, and the other lists get the room. CalcTape remembers both. With a finger, hold a list's heading for a moment and then drag: that moves the seam above it, the way holding the result bar makes the keyboard taller or shorter; to rearrange, the finger uses Customize library….
Two documents side by side

When two documents need to be visible at once, split the work area: right-click a tab → Move to new group. The document moves into a column of its own with its own tab strip. You can create as many groups as fit side by side in the window. The seam between them can be dragged, and the same menu moves tabs back and forth between groups.
The entry does not disappear while the command cannot run: it stands there greyed and names the reason behind its label, for example Move to new group (window too narrow). Two reasons occur: only one document here (the group keeps one) and window too narrow. The same goes for Move to its own window, with the first reason.
The same command comes as a button: Move to new group is on offer for the toolbar (chapter 10) and acts on the document in front of you. While it is greyed, its tooltip carries the same reason.
For a direct choice of the count, add Document groups from the category Window under Customize toolbar. Its menu marks the current count and offers as many groups as fit side by side in the window. The classic ribbon includes it under Start → View → Document groups. More groups take existing tabs; empty documents are created when needed. A smaller count merges the rightmost groups without closing documents. An explicit choice also replaces a split remembered when the window became too narrow.
Faster with the mouse: drag a tab onto the other group's tab strip. The tab travels visibly with the pointer, and a line shows where it will land – within the same strip as well, which is how you reorder tabs. A tab can just as well be dragged into a torn-off window and back.
A document always lives in exactly one group, so you never see it twice. If the window gets too narrow for every group to stay comfortably readable, the split folds away by itself – and comes back as soon as there is room again.
From the keyboard: F6 returns focus from a panel or command bar to the current document, even with only one group. Within the tape or text viewer, F6 moves to the next group (Shift for backwards, torn-off windows included). Ctrl+Page↓ / Ctrl+Page↑ step through the current group's tabs, and Ctrl+Shift+Page↓ / Ctrl+Shift+Page↑ push the current document into the neighbouring group – past the last one that creates a new group.
A document in its own window
Drag a tab out of the window and drop it on the desktop and it becomes a window of its own, right where you let go. If you prefer the menu: right-click a tab → Move to its own window does the same, and that command, too, can be put into the toolbar as a button. Such a window can go anywhere – on a second screen, for instance. Toolbar, status bar and the panels stay in the main window and follow whichever document you are working in.
Windows snap to the visible edges of nearby CalcTape windows. When resizing, snap points help match another window’s width or height. This also applies to the main window in Zen mode. Hold Shift to temporarily disable snapping. Windows remain independently movable. On Windows, and when moving a detached window by CalcTape’s own title bar, snapping happens while dragging; native window moves and resizes on Linux and macOS snap on release. On Linux this supports X11 and XWayland.
Getting back is the same gesture: drag the torn-off window by its title bar over the main window (or over another torn-off one) - the bare part of its tab strip drags it as well. As soon as the pointer is over a group's tab strip, the window lays itself translucently over exactly that area – so you see the place and the size it will take – and a line shows where its tabs will be inserted. Let go and it docks, and the window is gone. Over the paper nothing happens - so a window can simply be parked on top of the main window as well.
At the screen edges the window behaves as usual: the top takes the whole screen, the sides take half, the corners a quarter - shown translucently before you let go, too. The edge wins over docking, so it stays reachable even when the main window fills the screen.
With System window frame turned on in the settings the operating system moves the window - then its edges and full screen work like for any other window, and docking runs via the tab strip or the tab menu.
Closing a torn-off window sends its documents back to the main window; nothing is closed – that is what the ✕ on the tab is for. Back to the main window in the same menu brings a single document home.
Picking up where you left off
CalcTape normally starts on the worksheet. To continue where you stopped, turn on Restore workspace in the settings (Pro): the next start reopens the documents you had - in the same groups, in the same order, with the same torn-off windows and their size and position.
The state is not only written when you quit but kept up to date as you work, so a crash or a killed process costs you the last few seconds at most.
What comes back is checked first: files that vanished meanwhile are skipped, and windows whose place no longer exists - one monitor fewer, a different resolution, a different arrangement - appear centred on a screen that does exist instead of out of reach. Documents you never saved do not come back; they are on no disk.
6. Saving, exporting, printing
- Save stores the document as a
.calcfile (Ctrl+S). - Output offers Export as PDF, Export as Excel, Export as HTML, Copy document with formatting, Print and Print preview. Exports and printouts carry your theme's colors in their light variant, the sum colors included: they are read on a white page. While the tape stands on dark paper, PDF and HTML first ask Light or Dark: light is white paper, dark looks like the tape.
- Share sits in the ⋮ menu of the More element, which you can add to the toolbar; without that element, the commands Send CalcTape document by email and Send document and HTML by email send the document (section 10). Share first asks what goes along: the calculation as text, the CalcTape document, an HTML or a text document, in any combination. CalcTape remembers the choice. Then the system takes over: the share menu on Android and iOS, the sharing picker on the Mac, a new e-mail with the files attached on Windows and Linux. Nothing is saved on the way, and an untitled document can be shared too.
- Print (Ctrl+P) opens the separate Print view on the desktop. Choose a printer, copies, collation and, if needed, a page range. On Windows and Linux, Printer properties… opens the selected printer’s system settings; Apply uses them for the current job only. On Linux, Cancel ends an unresponsive properties dialog while the Print view stays open. On Mac, Print with system dialog opens the native print panel; choose the printer and its options there, then confirm the job. Paper size (A4 or Letter), portrait or landscape orientation and print font size update the preview immediately. When the tape uses dark paper, Dark paper is also available. Page margins, header and footer opens their editor; OK applies its changes. Your own header and footer text needs Pro; the freeware prints fixed lines with a freeware notice, and the margins stay adjustable. In each of the three fields per band,
**bold**,*italic*, and\nformat the text or add a line. Enter also inserts a line break. With Pro, choose a logo from the company profile or your own image and place it at the left, center, or right of the header. It appears above the header text on every page. Set its height; its width follows the image ratio. Each separator line can be switched off. Header and footer grow with their content; a minimum height can reserve extra space (0= automatic). The preview shows the actual print PDF, with page navigation and zoom. The wheel over the preview changes pages; Ctrl+wheel changes the view size. Print submits the job; on Mac, the system panel can submit it too. Page setup and preview remain available without a printer. Print preview opens the same view. Japanese characters from the tape remain readable in the PDF. On iOS and Android, Print opens the system print dialog. - Backup / Restore opens the two Pro actions Create backup and Restore backup. It is available in the toolbar and library; the classic ribbon has a separate section under File with both actions. Each action can also be added to a command bar individually.
A backup can include documents, the worksheet, Keyboard layouts and user keys, themes, settings and version histories. The dialog shows the source folder. Only files directly in that folder are included, without subfolders, documents that have never been saved or documents in other folders. Open changes to selected documents and the worksheet are included without saving the original files or clearing their modified flag. The detailed explanation opens from ⓘ Help in the title bar.
Include version histories applies to the selected documents and worksheet. Without either, the option is inactive. Save or Restore is inactive when no data is selected.
On restore, the dialog shows the destination folder. Existing data with matching names is overwritten; included histories replace existing histories completely. Undo cannot reverse a backup restore. The license and window position are kept. The automatic version recording setting is restored too.
A fully successful backup or restore receives a brief confirmation. Errors stay visible in a message listing the affected files or parts; partial success is explicitly reported. A read error during extraction leaves the existing document file intact. A version history is replaced only after it has been fully read and validated.
Revert to saved in the Save menu discards the current document's changes since its last save, after confirmation. It reloads the document file, rather than a ZIP backup or a selected history entry.
Earlier versions of a document
CalcTape keeps a record of how a document looked over time: the version history. With CalcTape Pro this happens by itself, when you pause after a few edits, when you open, save or close a document, before "AC", before "Replace all" and before restoring: whenever something could go missing. The freeware records the states you keep, plus the state before the last "AC", "Replace all" or restore.
The arrow next to Save offers both commands. The classic ribbon shows them under File, and the app bar offers them in its ⋮ menu. Versions is also available in the context menu of a file or document tab. The history dialog itself offers Keep current version, Name this version or Rename, and Settings. Settings opens the automatic recording setting directly. A note identifies disabled recording; for a document that has never been saved, the inactive commands explain: Save the document first.
- Keep this version… asks for a name and then records the state explicitly. The field already holds the time the version is listed under; take it as it is or empty the field, and the version stays unnamed. Kept versions are pinned: they stay put even after the automatic ones have been thinned out, so a state can survive a month of editing. The freeware keeps 3 versions per document; the next time you keep one, CalcTape asks whether to replace the oldest. A row's context menu names any version later, too.
- Versions opens the history: the timeline on the left, the selected state on the right - as paper, with results of its own.
The comparison is in the paper itself, and it knows three cases:
- A reworded line - a corrected amount, an edited text - is shown in full: the part that differs is underlaid more strongly (on a number line the whole value, operator through amount), and behind the line stands in the other colour what the other side says there ("→ 1,350.00"). You see both in one line.
- A red, struck-through line is one the other side no longer has.
- A green line is one that appeared there. It stands in its place on the paper but takes no part in the calculation: the results stay those of the version shown. A moved line therefore appears twice, struck through where it was and green where it is now.
Red is always the older wording, green the newer. You can compare against the current tape - the preview then shows what has happened since - or against the previous version - it then shows what this version did. The line under the preview says in words how many lines read differently, how many are gone and how many were added; the two arrows beside it jump to the previous and the next difference, and the first one is in view as soon as a version is selected.
Every version in the list carries three things: when it was recorded, what happened ("3 lines added · 1 changed") and to which line. Delete in the footer throws a single version away.
Every row ends in a pin. With CalcTape Pro it pins a version or unpins it again, as do Pin and Unpin in the row's context menu. A pinned version stays put when the history is thinned out, and once the history is full at 50 versions, the unpinned ones go first. In the freeware the pin shows which versions you kept.
Restore replaces the open document. With recording enabled, its current state is kept in the history first; with recording disabled, Undo brings it back. As a new document makes the old state a file of its own: CalcTape asks for a name in the displayed storage location, suggesting "<name> – restored version". The document it came from is left alone.
The history belongs to this device and does not travel with the file, but it does go into a backup (a box of its own in the backup dialog). CalcTape Pro keeps up to 50 versions of a document. What a trial recorded stays in the freeware as well. If you would rather have nothing recorded, switch Record versions automatically off under Settings → General; CalcTape then records nothing by itself, Keep this version still works, and what is recorded stays readable. A document you have never saved has no history - it is on no disk.
The trash
A document you delete in the document list goes to the trash and stays there for 30 days. While anything is in it, the library carries a "Trash (n)" entry; it opens the same two-column view as the version history - what was deleted and how long it still has on the left, the document as paper on the right.
Restore puts the document back into the folder it came from and opens it. Where its name has been taken again in the meantime, CalcTape counts up ("Invoice (2).calc"). Delete permanently and Empty trash clear up - and take the version histories of those documents with them, because a history belongs to its document.
7. Find and replace
In the classic ribbon, Find and replace is under Start → Find, right next to the search field.
Opening the dialog with its button places it directly below that button. At the screen edge, its position adjusts to keep it visible. You can then move the window freely.
The magnifier in the toolbar unfolds a search box (Ctrl+F). Enter jumps to the next hit, Shift+Enter to the previous one; F3 and Shift+F3 do the same from anywhere in the window. The ✕ in the box clears the search text.
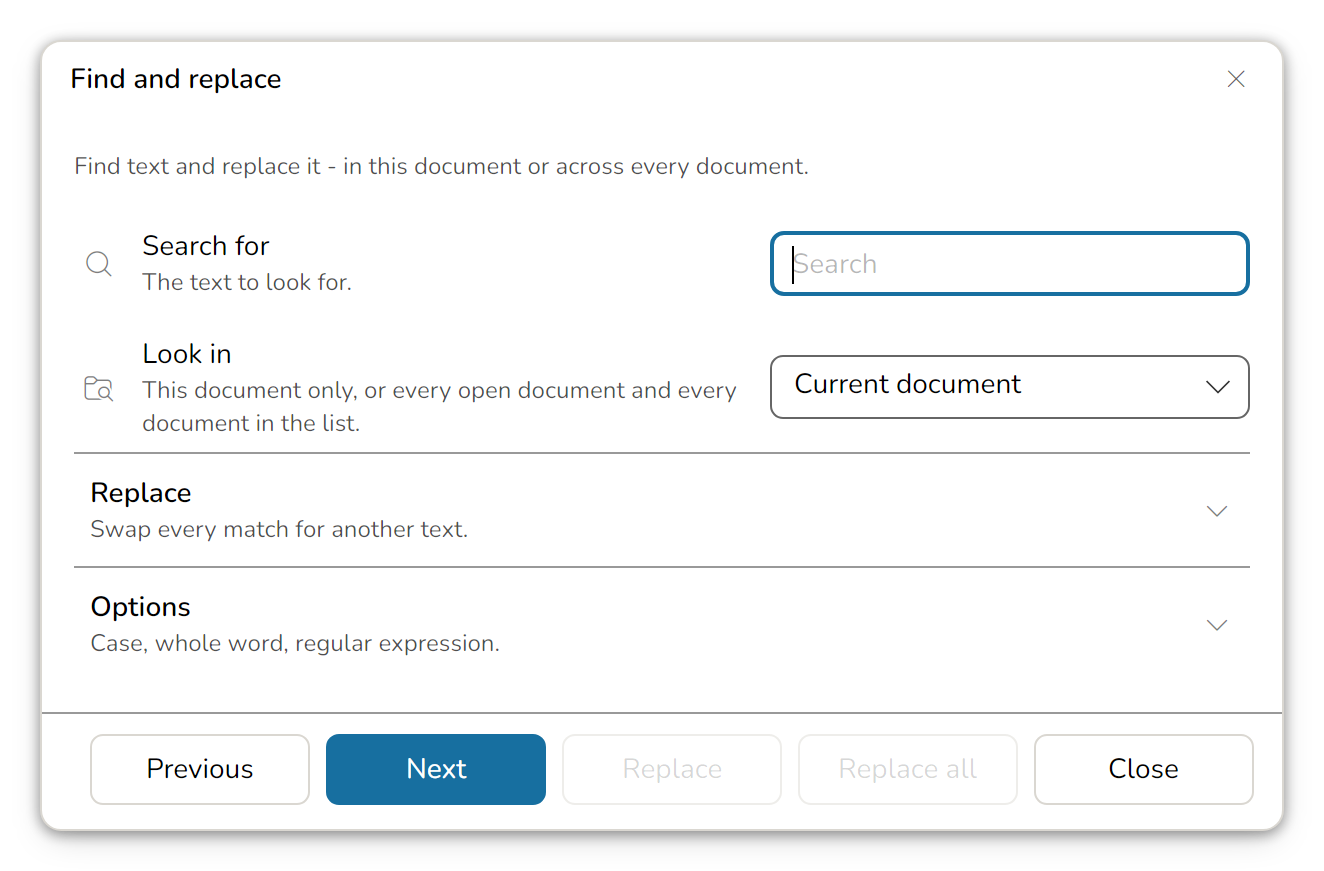
Everything beyond that lives in the Find and replace dialog – the icon next to it in the toolbar, or Ctrl+H. It stays open while you go on working on the tape, and shows the search itself to begin with:
- Search for – the text you are looking for.
- Look in – Current document searches only the document in front. All documents adds every open document and every document in the document list; a hit in a document that is not open opens it as a tab and jumps there.
Below them stand two headings you unfold when you need them. The dialog remembers which one was open.
Replace brings the Replace with field – what every match is replaced with. While the heading is folded away, the Replace and Replace all buttons are greyed: they would work with a text you cannot see.
Options brings the three switches. Its second line names which of them are on, folded away as well – the switches stay set across sessions.
- Match case – without this switch, "Rent" and "rent" are the same hit.
- Whole word only – "Rent" then no longer finds "Rental".
- Regular expression – the search text is read as a pattern:
\d+stands for a number,^for the start of a line. In the replacement,$1puts back whatever the pattern's first bracket found.
Next and Previous step from hit to hit, Replace swaps the one that is selected and searches on, Replace all does them all at once – and as one step, which Ctrl+Z takes back. Under the rows you can read what happened: "12 replaced", "Not found", or the complaint about a faulty pattern.
Replace all across all documents asks first, and for good reason: what happens in open documents is brought back by Ctrl+Z – documents in the list that are not open are written directly instead. The question names how many hits sit in how many documents, and how many of those are not open.
8. Experimental features
Some features ship before they are finished. They are usable but not fully tested yet: errors are possible, and their behaviour, their settings and the way they store things may still change from one version to the next. Those carry the marker (experimental) in the interface, in every edition.
Three features are marked that way at the moment:
| Feature | Where | Note |
|---|---|---|
| Comments first | Settings → Tape | Display only: files are saved in the usual order and stay readable by every other CalcTape. Manual spacing inside a comment may look different in this layout. |
| Calculations with brackets | Settings → Calculation | Brackets group lines of a calculation, see below. A document with brackets is saved in a newer format that older CalcTape versions do not open. |
| Excel export | Output → Export as Excel | Writes living formulas instead of text, so the calculation keeps working in Excel. Very unusual documents are worth a second look after the export. |
All three are Pro. Comments first and the Excel export leave your documents as they are: switch one of them off and the tape behaves as before, and no .calc file is written differently because it was on. Brackets live in the document itself; more on that below.
All three work only while Settings → General → Enable experimental features is on; out of the box it is, and so is Calculations with brackets. When you switch it on, CalcTape points out that these features have not been fully tested, so check carefully whatever you create with them. If you call up a marked feature while the switch is off, CalcTape says so and offers Enable right there; after that, the feature goes ahead.
The switch is a master switch: turn it off and every experimental feature rests. Your own setting, such as the one for Comments first, is kept and applies again as soon as you turn the switch back on.
Calculations with brackets
A bracket groups lines of a calculation, as in a formula. Type 10+(44-12+(3+4)*3)*3 and press Enter, and the tape reads:
 +         10.00
 + (
 │ +         44.00
 │ -         12.00
 │ + (
 │ │ +          3.00
 │ │ +          4.00
 │ │ ) = 7.00
 │ *          3.00  = 21.00
 │ ) = 53.00
 *          3.00  = 159.00
 ═══════════════
 =        169.00
The values behind the two * 3.00 are intermediate results (see Calculation steps in section 2).
(opens a bracket when you type it right behind the operator of a new line: the line becomes the opening line+ (, and the caret moves on to a new line for the first value. The operator of the opening line applies to the whole bracket; a minus in front subtracts the whole bracket. Type*,/or^right after(, and CalcTape puts that operator in front of the bracket; a minus is the sign of the first value. Digits, names and a further(typed at the end of an opening line go on the line below, to the first value.- To put existing lines into a bracket, type
(between the operator and the value of their first line: that line becomes the opening line, its value moves to a line of its own under it, and the bracket counts at once. Then type)behind the value of the last line; until then the calculation reports that the bracket is not closed. Under a total of 159,+ 12,+ 4and* 3become159 + (12 + 4) * 3= 207 this way. Type the(first: a)typed before it stays a comment. - The lines inside the bracket move in by two characters per level, with a thin gray rule in front of them. The rule of the bracket the caret stands in wears the accent color; a bracket that is still open is dashed. When the mouse pointer moves over the bracket, CalcTape shades it in color (Calculation steps, section 2). Copying and saving write the lines without rule and indentation.
)closes the bracket behind a value and gets a line of its own, the close line. Behind the)the tape shows the value of the bracket, a little smaller and with an equals sign in front of it () = 7.00); a comment goes behind it. The caret's line and a marking show no value. Copies and exports write the line as) = 7.00, the saved file as) | 7.00.- A click on the value behind the
)marks the whole bracket, from its opening line to its close line; the copy icon beside the marking puts it on the clipboard. - Enter at the end of the calculation closes every bracket that is still open, each with its own line, and then draws the total as usual. While a bracket is open,
=behind a value acts as Enter too. - Backspace right after
(takes the bracket back, and so does Enter on its still empty first line. - A close line without an opening line reports an error, and so does a bracket with a divider under it before it was closed. When a bracket has no valid value, for example after a division by zero, its close line shows no value.
- Paste as calculation (Ctrl+Shift+V) understands brackets as well:
12+14+(25-13)*11=gives the same lines as typing.
Type brackets on the device’s keyboard, or assign the system keys ( and ) to a keyboard layout (section 11).
Brackets in notes stay notes. (3 nights, see receipt only becomes a bracket once you go on calculating right behind the number. Pasted or opened text counts a bracket only when an operator stands in front of it and its close line follows in the same calculation block. When its first value stands on the same line as the bracket (+ ( 25), CalcTape splits that line: + (, and + 25 below it; the total stays the same.
A file with brackets records that in its header. It calculates its brackets while the switch is off too, and in every edition, and you type brackets in it as with the switch on; the switch decides whether you can type brackets in other documents and whether text without that record is read as brackets. Older CalcTape versions do not open such a file, so none of them can read the brackets as notes and calculate something else.
PDF export and printing show the brackets as the tape does, with indentation, rule and value; their fields appear there when the shading of brackets is set to Always. The Excel export writes them as formulas: the close line of a bracket calculates its lines, the calculation around it refers to that cell, and the lines of a bracket are grouped in Excel, so they collapse down to the close line.
9. The interface at a glance
From top to bottom:
- Title bar with the name of the active document.
- Toolbar – the commands you need most (section 10). Which icons it carries is up to you.
- Tab row – one tab per open document (section 5).
- Tape – the sheet you calculate on (section 2).
- Panels on the right: tabs at the right edge show and hide the library, keyboard, user keys and "Values and texts" independently. If there is too little height for the vertical labels, the tabs show only their icons; the tooltip still names the panel. In each panel's section editor, Rename gives the panel a name of your own. That name stands on its tab and stays the same when you change the UI language; Default beside the name restores the translated name. The tape panel can be renamed the same way; it has no tab. The library, "Values and texts" and the keyboard are between 180 and 360 DIP wide in a side column and as a floating sheet (DIP are logical pixels, see below). Out of the box the library opens about 306 DIP wide, "Values and texts" about 220 DIP. Drag the inner edge to change the width; a double-click restores the default. Stacked panels have the same width, and a keyboard column stays at most 360 DIP wide. Panels above or below the tape share its width equally.
- Status bar. It can carry result, selection, grand total, memory, license note and the slider for the font size. Which readouts it carries, and in which order, is yours to arrange: right-click the bar → Customize status bar…, or Settings → Controls → Contents of bars and panels. Separators and flexible gaps arrange the bar the way they do the toolbar: whatever follows a gap stands at the right edge. And like the toolbar it has an arrangement of its own for every width step – Narrow, Medium and Wide; the window width decides which one applies (see "Arrangement by window size" below). Both bars change over together. The default shows Result and Grand total on the left. Narrow places the license badge on the right, Medium the license note. Wide places the license note between two flexible gaps and the font-size slider on the right. Restore default loads this arrangement for the selected width step; your changes remain until then.
Click the result, grand total, memory or displayed selection sum to copy the shown number to the clipboard without its label. A tooltip explains the copy action on hover; Copied confirms the click.
Dialog windows can be resized in width and height; CalcTape remembers the size you drag for each dialog. Reset appearance and arrangement (section 14) forgets those sizes again.

Arrangement by window size
Where the library, the keyboard, the user keys and the "Values and texts" panel stand depends on the size of the window – in fixed steps you know beforehand: three width steps (Narrow below 700 DIP, Medium up to 979, Wide from 980) and three height steps (Short below 500, Medium up to 699, Tall from 700). DIP are logical pixels, independent of screen pixel density. Height is measured below the command bar and includes the space for the status bar. Each of the nine combinations has a plan, and each width its own command bar and status bar. Within a step, panels keep their configured display, visibility and position. Limited space does not move a panel into a popover. The width you set stays saved as its desired width. When space runs short, the areas, including the keyboard, shrink proportionally toward their minimum widths. With more space, they grow back to their desired widths. Stacked panels fill the same column, whose width follows the largest desired width. Individual maximum widths do not apply to shared columns, including when dragging. A keyboard column stays within 360 DIP as a whole, including when dragging. Panels above or below the tape fill its width; several panels side by side divide it equally without individual minimum or maximum widths. Automatic fitting leaves your saved widths unchanged. The tape uses the remaining space and scrolls sideways when needed. Panels and bars keep their configured items. When space runs short, icon buttons in horizontal bars and vertical panel tabs show only their icons; labels return when space allows. The classic ribbon collapses whole sections when space runs short; clicking a section button opens its controls. Limited space does not add scroll areas. Areas may overlap or extend beyond their available space only when their combined minimum widths no longer fit.
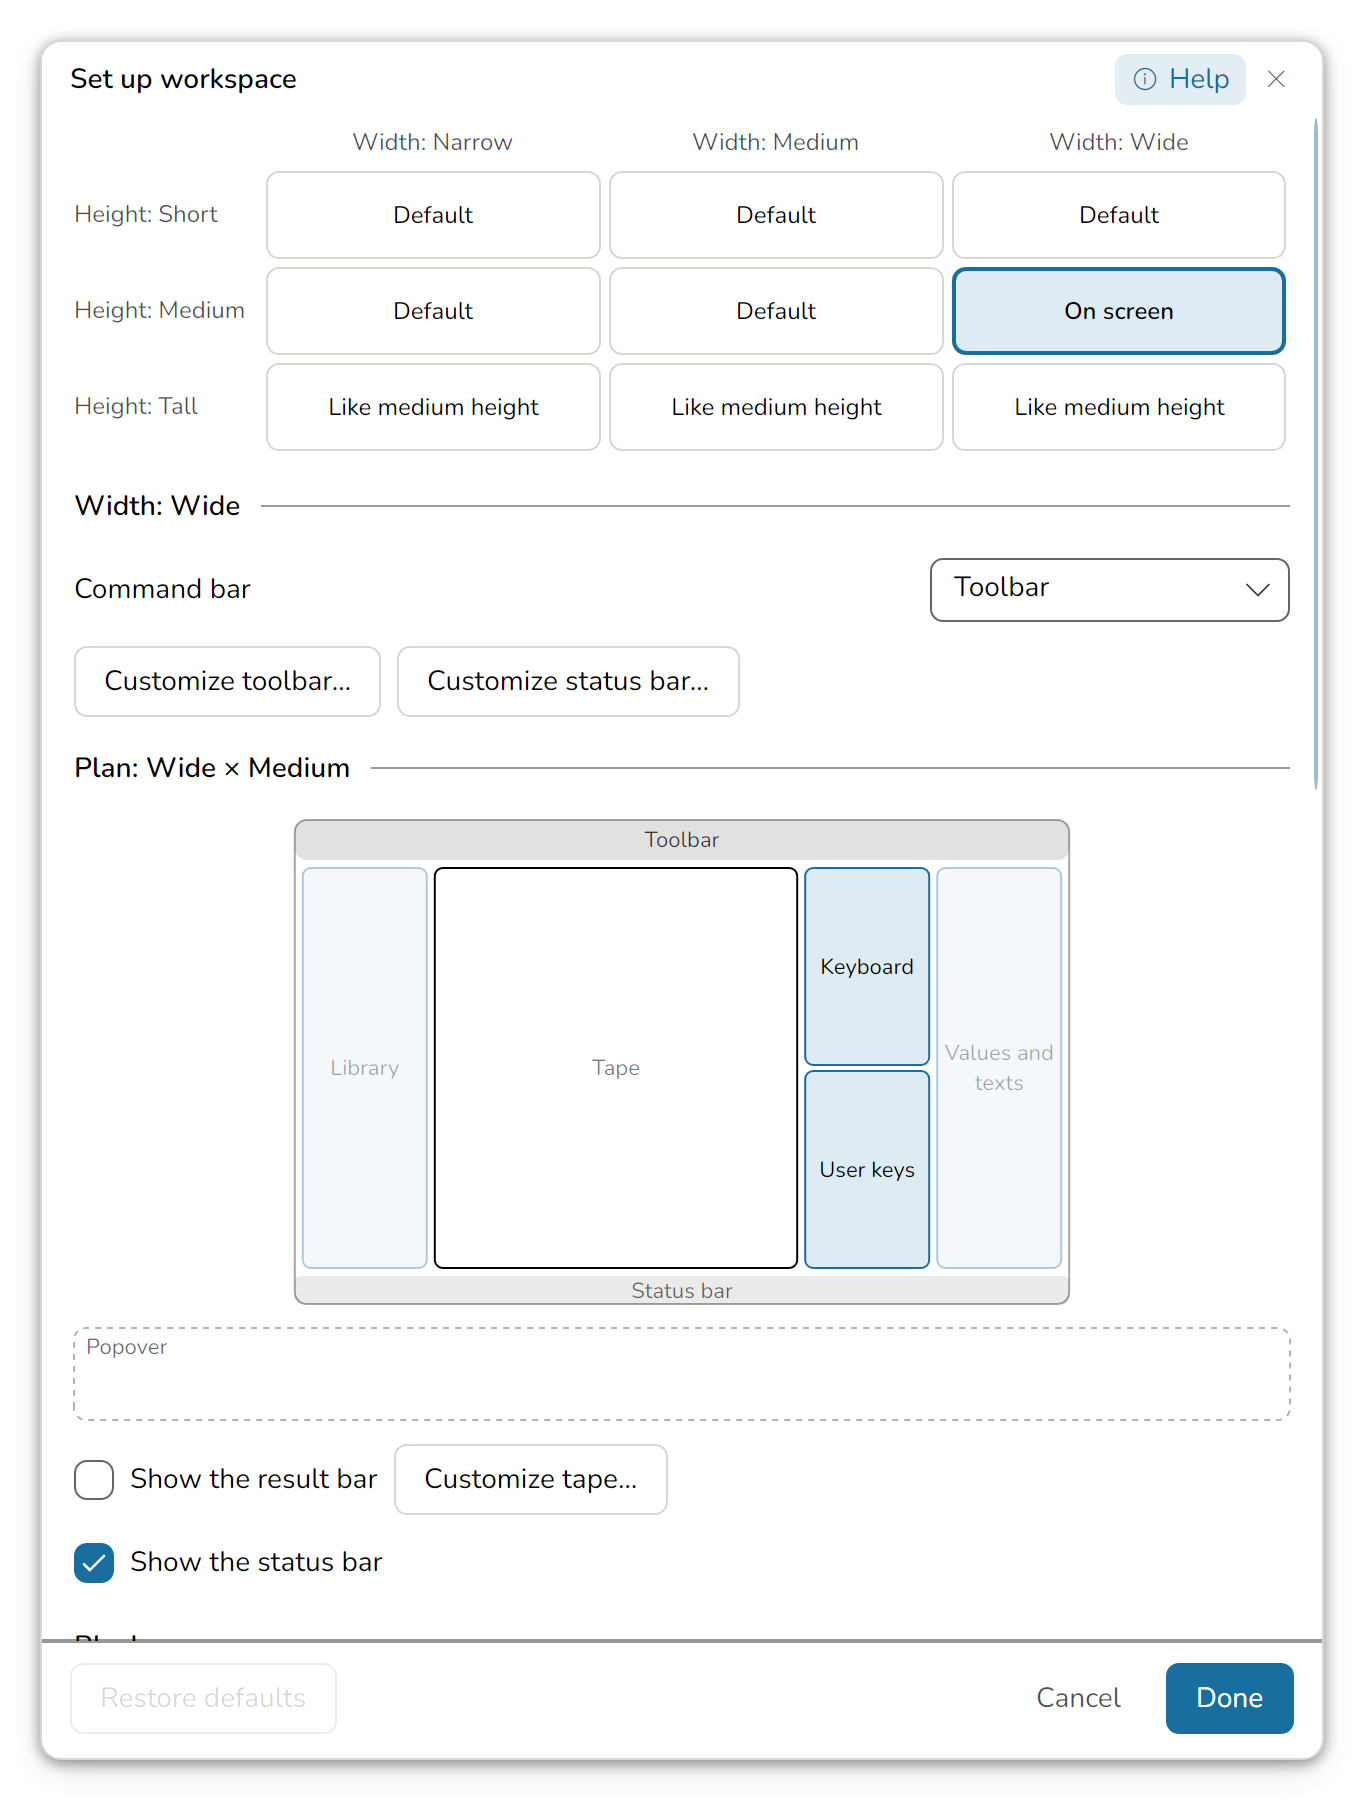
Plans are arranged under Settings → Controls → Set up workspace (or right-click the toolbar → Set up workspace…). At the top you pick a window size; the one in use is marked. Below, you set the command bar for the width – toolbar or classic ribbon on the desktop, toolbar or app bar on phones, tablets and in the browser – and the plan for the size.
Choose the Display for each panel:
- Docked: Place sets left or right of the tape, above or below it. Beside the tape, panels form columns with panels stacked; above and below, they form rows with panels side by side. Position places the panel relative to a named neighbor, such as Below “Keyboard” or Right of “Keyboard”. The list also says Same column or Separate column; for rows, Same row or Separate row. There is no position field without a neighbor. Initially show applies when first switching to this window size and after changing this default or the display. Each size and device class retains its last chosen panel state after restarting. A panel opened at Wide returns after switching to Medium and back; a manually closed panel stays closed. Without the checkmark, the panel is initially closed; its tab or the command bar opens it at the saved place.
- Popover: Opening side sets Left or Right. The panel starts closed and opens through its tab or the command bar as an animated popover over the workspace. Clicking outside closes it. The library also opens through ☰; on phones and in narrow windows, it opens as a full-height drawer.
Switching display keeps the dock position and initial visibility. Closing a panel leaves the plan unchanged. On demand and Hide are no longer place choices.
In the sketch, drag panels to their place. Drop one on the edge of a column to make a new column, or in the middle to join it. The Popover field changes the display. Initially closed docked panels stay dimmed at their place. Whether the result bar stands right at the paper is the plan's; whether above or below it is the Tape panel's. Changes appear in the preview immediately; Cancel, Escape, or the close button restores the state before the editor opened.
In both Windows presets, at Width: Medium, the keyboard and user keys are visible in the same right-hand column. At Height: Short, user keys stand in a separate row below the tape; the keyboard stays on the right. The library and "Values and texts" open as popovers. At Width: Wide, the keyboard keeps the same places; the library is docked on the left and values in a separate right-hand column, both initially closed. At Width: Narrow, user keys are visible below the tape; the keyboard, library and values open as popovers. The result bar at the paper is off by default; the status bar is on.
The keyboard panel contains only keys at Short height, the compact result and keys at Medium height, and the result card, keyboard segments and keys at Tall height.
There are no floating panel buttons over the paper on the desktop. In the browser and on phones and tablets, a popover panel can get one.
A short or tall window size takes the plan of the medium height until you give it one of its own – the checkbox Same as the medium height says so. By default both Windows presets have their own Short plans; Tall inherits Medium. A tablet held upright also has its own plan: the keyboard stands below the tape, on a phone held sideways beside it. The height of a keyboard above or below the tape is dragged at its seam; it applies to the window size you dragged it in.
The keyboard’s Customize panel dialog lists Keyboard and User keys separately. Remove and add either independently. User keys stay below the keyboard.
Keyboard and User keys have separate editors under Settings → Controls → Contents of bars and panels, even when they share a frame. In User keys, show, hide or reorder the elements for each height step. The panel header belongs to the frame and is not an element you can add. Its sections button opens the same editor. Cancel restores the state before opening; Restore default resets the selected height step.
In both Windows presets, the Short library omits Import documents and Backup / Restore. Medium and Tall keep both sections. Recently used and Backup / Restore start collapsed.
What the panels carry follows the height step instead: the tape, the library, the keyboard and "Values and texts" each keep a list of their own for Short, Medium and Tall, the way the toolbar and the status bar keep one per width step. Their editors under Settings → Controls → Contents of bars and panels show three height step buttons at the top and open on the one in use. The fill of the upright rectangles shows Short, Medium and Tall; horizontal rectangles show the width step in the toolbar and status bar editors. On screen marks the step the app currently uses, even when you edit a different step. Show example size opens the selected width or height at its actual size (1:1) beside the dialog. Height panel previews show the content and fold states of the selected step. Toolbar and status bar previews show the selected width step's items in order; available status values come from the open document. The heading shows its range in DIP: below the first boundary, between the boundaries or from the second boundary upwards. Drag the bottom grip to change the height or the side grip to change the width within the selected step. The preview stays at 1:1 and scrolls when it exceeds the available screen space. Choose another step under Copy settings from and press Apply to copy its list and fold states. Cancel restores every list and fold state changed in this visit.
Select a collapsible section in the right list, such as Documents, Recently used or Backup / Restore. Initially expanded sets its state for Short, Medium or Tall. The option is available in all five panel editors, including sections copied from another panel. The state belongs to the panel containing the section; copies in other panels keep their own states. Repeated sections within the same panel share their state. Expanding or collapsing a section in the panel later saves the new state for the height step currently in use. Restore default resets the selected step's fold states.
Keyboard and User keys remain separate panels when placed directly above and below each other. Right-clicking the empty area below the user keys opens their panel menu.
By default, the keyboard lists in both Windows presets contain the keys at Short, the compact result and keys at Medium, and the result card, keyboard segments and keys at Tall. Panel headers belong to layout mode. The Tape panel carries the document tabs, the tape itself and the result bar: listed before the tape, the result bar stands above the paper, otherwise below it. The document tabs can be taken out; the paper then starts right under the command bar. What the result bar itself carries is set under Contents of bars and panels → Result bar; separators and flexible gaps structure it like the status bar.
Every panel editor offers the elements from all panels. You can move them between panels and add more than one occurrence. Only the tape itself stays once in its original panel; other elements can stand above or below it. The tape panel cannot be hidden. The toolbar, status bar, result bar and classic ribbon editors likewise offer the items from all bars, and items may appear more than once.
To hold a step instead of leaving it to the window size, pick it under Settings → Controls → Width step or Height step (visible with Show advanced settings). Cancel in the Set up workspace dialog puts everything back as it was when the editor opened, Restore defaults the plans as shipped.
Plans, bars, theme and key sizes belong to the device class: Desktop (Windows, Linux, macOS), Web and Mobile (Android, iOS) each keep their own. Calculation, number format and text settings apply everywhere. A backup from a phone therefore changes only the shared settings on a desktop.
10. The toolbar

The row is freely arrangeable: the settings decide which commands it shows and in which order. Every width step – Narrow, Medium and Wide – has a row of its own; the window width decides which one applies, or you pin the step under Settings → Controls → Width step (section 9, "Arrangement by window size"). Separators and stretchable gaps let you form groups. Each item shows either its icon alone or icon and caption – set per item in the toolbar editor.
The Narrow default shows the library, Open, Save and Output on the left; Search, Find and replace, Dark mode, Zen mode and settings on the right. Medium adds New, Undo, Redo, Backup / Restore, Calculation mode and Number format. Wide adds Manual and Theme and shows the calculation mode with its caption. Restore default loads the selected width step's default; your changes remain until then.
The order is yours to set with the editor's arrow buttons, or by dragging an item with the mouse to where it belongs – a coloured line shows where it will land. The same gesture brings one over from the left-hand list, and dragging one back there takes it out of the row. On a touch screen, hold the item for a moment before it travels: the list itself is scrolled with the finger too. On the grip at the end of the row (the dots) it comes along at once. Every editor of this build answers the same gestures – the library, the keyboard panel and the "Values and texts" panel included.
Panel headers belong to arrangement mode and stand above the element lists. Document tabs and the result bar can be moved, removed and added more than once. Only the tape itself stays once in its panel. The arrangement decides where the user-key panel stands.
Every context menu of an element inside a panel also offers Customize panel for the surrounding panel and Set up workspace for the whole arrangement. Layout mode switches the panel headers used for dragging on or off. These commands are also available from the context menu of an empty panel area. An element moved to another panel opens the editor of the panel it is currently in.
The categories are File, Edit, Calculate, Panels, Window, Theme, Sizes, Language, Help and Command bar. With more than 15 offered items, the list starts grouped by category with every category folded. Filtering opens matching groups.
The ribbon instead of the toolbar

If you prefer the commands spelled out and sorted into tabs, switch to the Classic ribbon by right-clicking the bar (Command bar) or in the arrangement, for each width. It is the band of CalcTape for Windows: three tabs, File, Start and Settings, carrying labelled sections – File, Output, Help and Info; Clipboard, Edit, Input style, Calculation mode, Find and View, then Number format, Sizes and General – in which every button wears its caption. On Settings the buttons show the current value, such as "Decimal places: 2"; clicking "Number format…" opens that page of the settings. The document card left of File opens and closes the library.
After importing settings from the previous CalcTape, CalcTape asks whether the classic ribbon should replace the toolbar – on first launch as well as for a later import. Use classic ribbon shows it in medium and wide windows, Keep toolbar leaves everything as it is. Press F12 to switch between the ribbon and the toolbar at any time. A valid imported Pro or Business code activates that edition immediately, so the edition chooser is skipped. If the imported code belongs to CalcTape 5, a notice explains that it does not unlock this version and gives a contact for an upgrade offer. Import settings appears in the library only while matching old registry values exist. If the previous app is no longer registered in Windows, you can delete those values after importing; its old worksheet and documents remain in their folder. After import, the key strip shows exactly the previous app's user keys and keeps their assigned shortcuts. Importing again reuses keys with the same caption, text and Enter setting. The previous theme is selected; changed colors, paper and lines are saved in a theme of your own, Windows colors. The previous app had no dark variant, so CalcTape derives that theme's dark half from these colors. Font and key sizes and matching startup choices follow the old settings. The previous window position and size are also used when you import later.
The band can be rebuilt: Customize ribbon… (right-click the band, or Settings → Controls → Contents of bars and panels → Classic ribbon) opens an editor with a picker for the tab and one for the section. Sections and tabs can be added, renamed, deleted and moved; the buttons of a section are picked from the same offer as for the toolbar, by arrow or with the mouse, and each can stand large (icon above the caption) or small. With more than 15 offered items, the list starts grouped by category with every category folded; otherwise it starts alphabetically. You can change the order and filter the list. Show company logo and edition, below the two pickers, takes the logo and the edition off the right end of the band; the switch also stands under Settings → Controls, and an import from CalcTape 6 brings its setting along. The band shows every change at once; Cancel restores the previous arrangement, Restore default the band as shipped.
The ribbon needs room, which is why the command bar belongs to the width step: choose the ribbon for wide windows only, and narrow ones get the toolbar – as soon as the window is wide enough again, the ribbon is back. Within its step, the ribbon collapses whole sections from right to left when space runs short. A button with an icon, section name and dropdown arrow opens the complete section with its existing buttons. Sections return to the ribbon automatically when space allows. Your arrangement and settings stay saved. Collapsed sections also need room; choose an arrangement that fits the window.
Both editors also offer Print, Quick print, the two email commands, Default folder for documents, Reset layout, About, Manual, License terms, Differences from CalcTape 6 and Exit. Quick print uses the current print settings on light paper without asking about paper color. The email commands open a draft with the current CalcTape document and, optionally, an additional HTML attachment, without the format picker. The default folder appears in the document list and becomes the starting folder for Open and Save; afterwards these dialogs remember the last folder used again. License terms shows the current edition’s license agreement with Close. Differences from CalcTape 6 describes, in the same window, what has changed compared to the classic Windows app; this entry exists on Windows and Linux. In this window the field at the bottom next to Close searches the text: from the third character while typing, any term with Enter. Enter and F3 go to the next match, Shift+Enter and Shift+F3 back, Ctrl+F puts the cursor into the field. If the text is longer than one and a half visible pages, the round button at the bottom right leads back to the top, to every chapter and to the sections inside it. Choose edition opens the edition choice. The button is hidden with a Pro or Business license and remains visible during the trial. Reset asks first and includes the theme and sizes; Exit asks about unsaved documents. Quick print, email, default folder and Exit are available on desktop.
11. The keyboard and the user keys

On Windows, only K1 is set up initially. Additional keyboards, their names and their assigned layouts are configurable.
The default set of K1, K2 and NAV comes from the Android app:
- K1 – the number block with the operators and the memory keys (M+, M−, MR, MC).
- K2 – function keys: square, root, reciprocal, sign and the tax keys.
- NAV – text and navigation keys: arrows, start and end of line, selection, cut, copy, paste.
Everyday function keys [4x4] is another built-in layout. On the left, top to bottom, are ( and ), % and |, x² and xⁿ, then √ and a plain new-line key (the same as Shift+Enter). On the right, +TAX, −TAX, +TAX2 and −TAX2 stand one below the other, each two columns wide. Every empty slot of a keyboard shows a plus key. Click it to open the key editor, then Save or Discard the change.
Choose the selected keyboard’s layout in the keyboard menu: Keyboard layout for K1 (using its respective name) opens the list as a dialog – the same layouts as in the mobile app, left-handed variants included, in groups: Own layouts at the top, then number pads, memory keys, desktop, function keys and text navigation. The choice is always made for the tab that is currently selected, which is why its name is in the title. The info button ⓘ at the end of each line shows a thumbnail of that keyboard with its name above it, every layout that already sits on a tab carries that tab's name behind it in brackets – the tab you are changing included – and the choice takes effect on OK. Restore default keyboards restores the keyboards of the selected preset. That menu also holds Edit layout: click a key to change its assignment or size, duplicate layouts, rename them or restore the defaults.

The keyboard menu shows the current layout’s name as its heading.
A keyboard entirely your own starts with New layout… in the same menu (Pro): a name, Columns (3 to 8) and Rows (3 to 10), and what the grid starts with – nothing, or the keys of an existing layout you import; the chosen columns and rows stay as they are. The new layout then sits on the tab that is selected, and editing starts right away. While you edit, the whole grid is shown and every free place carries a +: click it and pick a key. To remove a key from the layout, click it and choose Remove key in the key editor (Pro). While editing the layout, Remove key is also directly available in a key’s context menu, below Edit key…. Its cell becomes free; a double-size key also releases the cells it covered. A user key remains available for other assignments. Discard restores the removed key. To move a key, drag it onto another place (Pro) – the key there trades places with it. The user keys work the same way, without Pro, once their edit mode is on; with a finger, hold the key there for a moment before you drag. Several keys move at once with the mouse: Ctrl+click marks a key (and unmarks it again), Shift+click a rectangle from the last key you clicked to this one, Ctrl+A all of them, and a drag with Ctrl held, or one that starts on the ground between the keys, draws a frame over the keys you mean. Marked keys wear a heavier border; drag one of them and all of them travel, and keys in the way move to the places that came free. After moving, the selection clears automatically, so the next key can move alone. Esc also clears the marking before a move. The banner above the keys carries three links for the layout itself (all Pro): Name… changes its name – on a built-in layout it names the copy that saving creates; Grid… changes the columns and rows, and if keys fall outside, the dialog says how many; Import… takes the keys of another layout – they replace the ones there, and the edited layout keeps its grid. You can change the columns and rows explicitly in the import dialog. Nothing is written until Save, and Discard takes it all back. A keyboard with more than four columns requests more width, so its keys stay as large as those of the others. In a side column and as a floating sheet, the same 180–360 DIP bounds apply.
In the layout picker, the buttons at the bottom act on the selected layout: Duplicate… creates your own copy of any layout; Rename… and Delete are enabled for your own layouts. The same commands are in each row’s context menu (right-click or hold). Layout preview shows the same thumbnail as the info button, without changing the selection. Deleting asks for confirmation. These changes are saved immediately; Cancel only drops the pending layout choice. OK assigns the selected layout to the keyboard. Delete layout is also available in the keyboard menu for your own layouts; finish any editing session with Save or Done first.
The Del system key (⌦) deletes the character to the right of the cursor or the entire selection. Holding the key repeats the deletion. You can assign this key to a keyboard layout in the key editor.
The system keys include ( and ), the keys for calculations with brackets (chapter 8): they type their character, and CalcTape decides what it means – with brackets switched on, "(" on a calculation line opens a bracket and ")" behind a value closes it.
The same menu carries Key style – the shape of the key faces: Standard (rounded corners), Modern (pills) as in the Android app, Classic (flat) with hairlines between the keys, 3D (raised) lit from above with an edge that gives way when pressed, or Outline (no fill), where only the contour and the caption stand, in the key's color. Below it, Key border adds a thin edge in a shade of the key's color to every style but the outline. Key shadow offers Off, Light and Strong. Strong is the previous on setting. All of it applies to every keyboard and to the user keys, and it is in the settings under Keyboard as well.
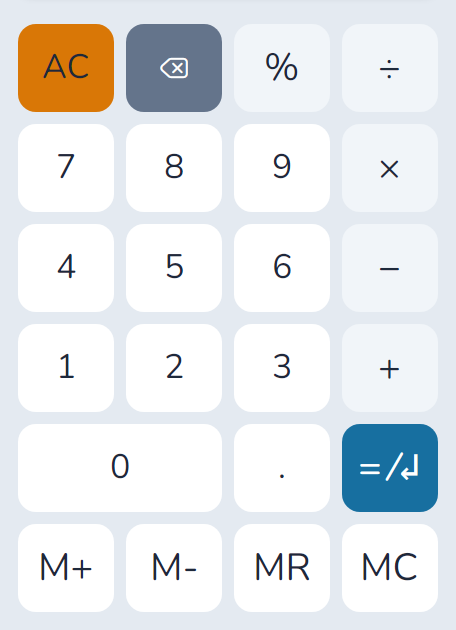
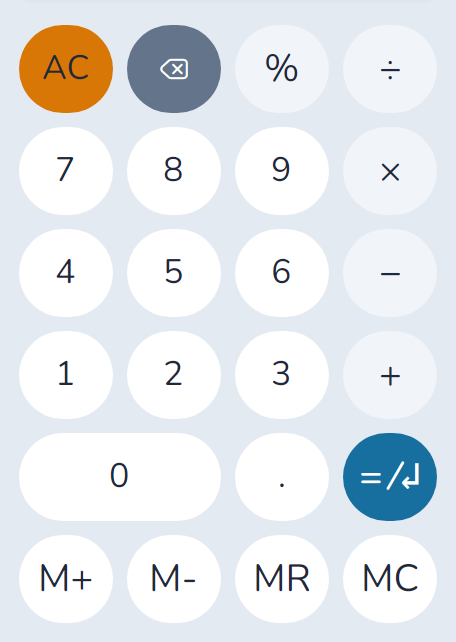
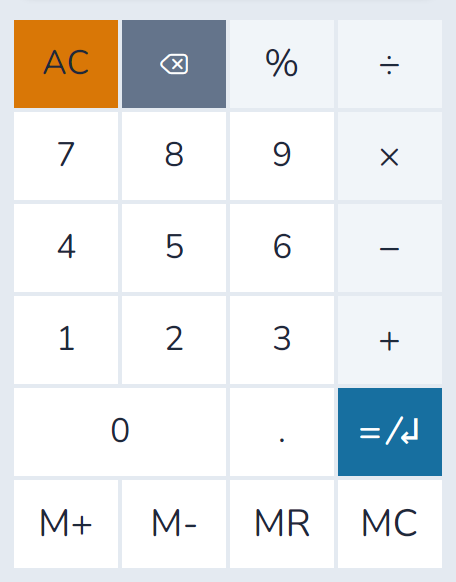
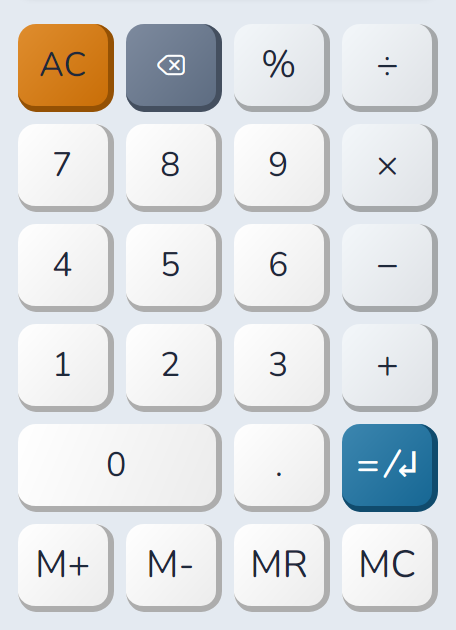
Below the keyboard sit the user keys: freely assignable keys for whatever you type over and over. They come set up with your country's tax rates out of the box. + lets you choose an existing key for the strip. To enter edit mode, right-click a key or an empty area of the strip and choose Edit the user keys. On Desktop, the panel header has no additional pencil button for this. On Web and Mobile, the normal panel header in layout mode shows the pencil whenever that panel contains user keys. Unused space at the end of each row gets a + tile; at least one remains available while the icons are shown. Each row shows at most one + tile, including an empty row. Show add key icons in the context menu shows or hides these tiles. The choice is saved per device class. Add key… stays in the context menu, including when the icons are hidden or the strip is empty. Extra tiles appear or disappear as the order changes. Choosing a key through + inserts it at that position. In edit mode, dragging onto another key exchanges their positions in the order. While dragging, the whole key with its face, border and caption follows the pointer immediately. Both keep their widths; the strip wraps to another row when needed. Dragging onto + moves the key to that gap. Save keeps the arrangement, and Discard restores the previous one. While a key's context menu is open, an accent ring marks that exact key on the keyboard or key strip. The mark disappears when the menu closes. Remove from strip removes just that position, even when the same key appears more than once; this works in Freeware. New in the key editor creates a user key (Pro); Delete user key removes the key definition in Freeware too. For a new key, set its caption, the text to insert and optionally a closing line break. Shortcut offers None or Ctrl+Shift+F1 through F12. A key with a shortcut shows it small in its lower right corner, such as “F8”. Assigned shortcuts show their key's caption, shortened to at most 30 characters. The shortcut stays with its key when you move it on the strip. Choosing a shortcut already in use moves it to this key. In the Formula / Text field the sequence \n stands for a line break, so one key can insert several lines. In +19% | Taxi fee, CalcTape calculates the percentage value after | and adds Taxi fee as a comment on the calculation line. If it reads = name – an equals sign followed by exactly one word – the key gives the result that name: it closes the calculation, and = name stands behind the total, which is a named value from then on (section 4). With the caret already behind a result, or on the empty line below it, that result gets the name. A total that already carries another name keeps it. For the tax keys, Reset to default brings your country's values back into the fields, and clicking the country name beside it opens the list of every country CalcTape knows tax rates for, grouped by region. Either way, nothing is written until OK.
12. The result card
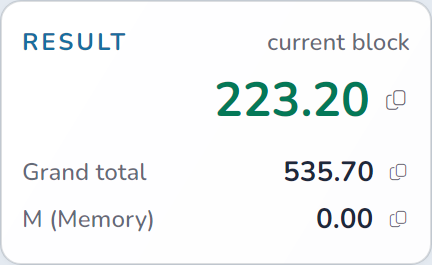
At the Tall height step, the keyboard panel can show the card with the three values you keep an eye on while calculating:
- Result, marked current block – the result of the block the caret is in, in large type.
- Grand total – the total across the whole document.
- M (Memory) – the value in the calculator memory (M+/M−).
The compact result card, by default in the keyboard panel at the Medium height step, shows only the result and the grand total, in two lines.
Long numbers use smaller type when needed. Both the full and compact result cards keep their height; each row reserves room for its largest font size.
Clicking a row puts its value on the clipboard; the copy icon at the end of the row briefly turns into a check mark. The card can be hidden under Settings → Keyboard.
13. Appearance: themes, colors, zen mode
- Theme picks the color world: colors, keys and the paper underneath, each light and dark. The toolbar's theme item wears the current palette and opens the choice as a preview. The Theme row under Settings → Appearance opens the same picker: every tile shows the app in its colors. My themes come first, then Themes that come with CalcTape and the looks of the current platform. When the picker opens, it scrolls the selected theme into view and expands its group if it is collapsed. These looks have a dark half too: where the old app had none, it is derived from its light colors. Only debug builds also show the looks of the other CalcTape apps (Windows, Android, iOS, Mac) in separate groups.
- Light/dark follows the system if you want it to. Beside it sits Use system accent color – the color for selection and switches then comes from the operating system instead of from the theme. By default, CalcTape uses the theme's accent color. If the system provides no accent color, this switch is off and disabled. CalcTape then uses the theme's accent color.
- Edit theme (Pro) opens the editor: editor and key colors, the accent, and paper, background color, lines and line color. Saving turns a shipped palette into a theme of your own under a name you give at the top of the dialog – the shipped one stays untouched. Light and dark always belong together. A theme of your own can be renamed or deleted from the theme sheet with the right mouse button, and backups offer it as a part of its own. Linen under Paper adds a fine woven texture over the selected Background color. The paper color remains freely selectable in light and dark mode. The Accent swatch keeps showing the color stored in the theme when the system accent color is enabled. Turning the switch off uses this color again in the app.
- Zen mode (F11) clears away everything that is not the tape. The window becomes a small pad in the top right corner of the screen; where you move it and how large you make it is remembered separately from the normal window, and F11 switches between the two. In the classic ribbon, the command is under Start → View.
The font size of the tape is set at the bottom right, the font sizes of the interface and of the text view in the settings. Ctrl+wheel resizes whatever the pointer stands over: the tape over the tape, the key captions over the keyboard, the text over a text view (an opened markdown file, the differences from CalcTape 6), the interface everywhere else. In a text view Ctrl+Plus, Ctrl+Minus and Ctrl+0 (back to the default size) work as well; on the tape these keys remain the memory keys and the shortcuts of named values. While a size change is still being laid out, CalcTape skips further notches and key presses, so nothing runs on afterwards.
14. Settings
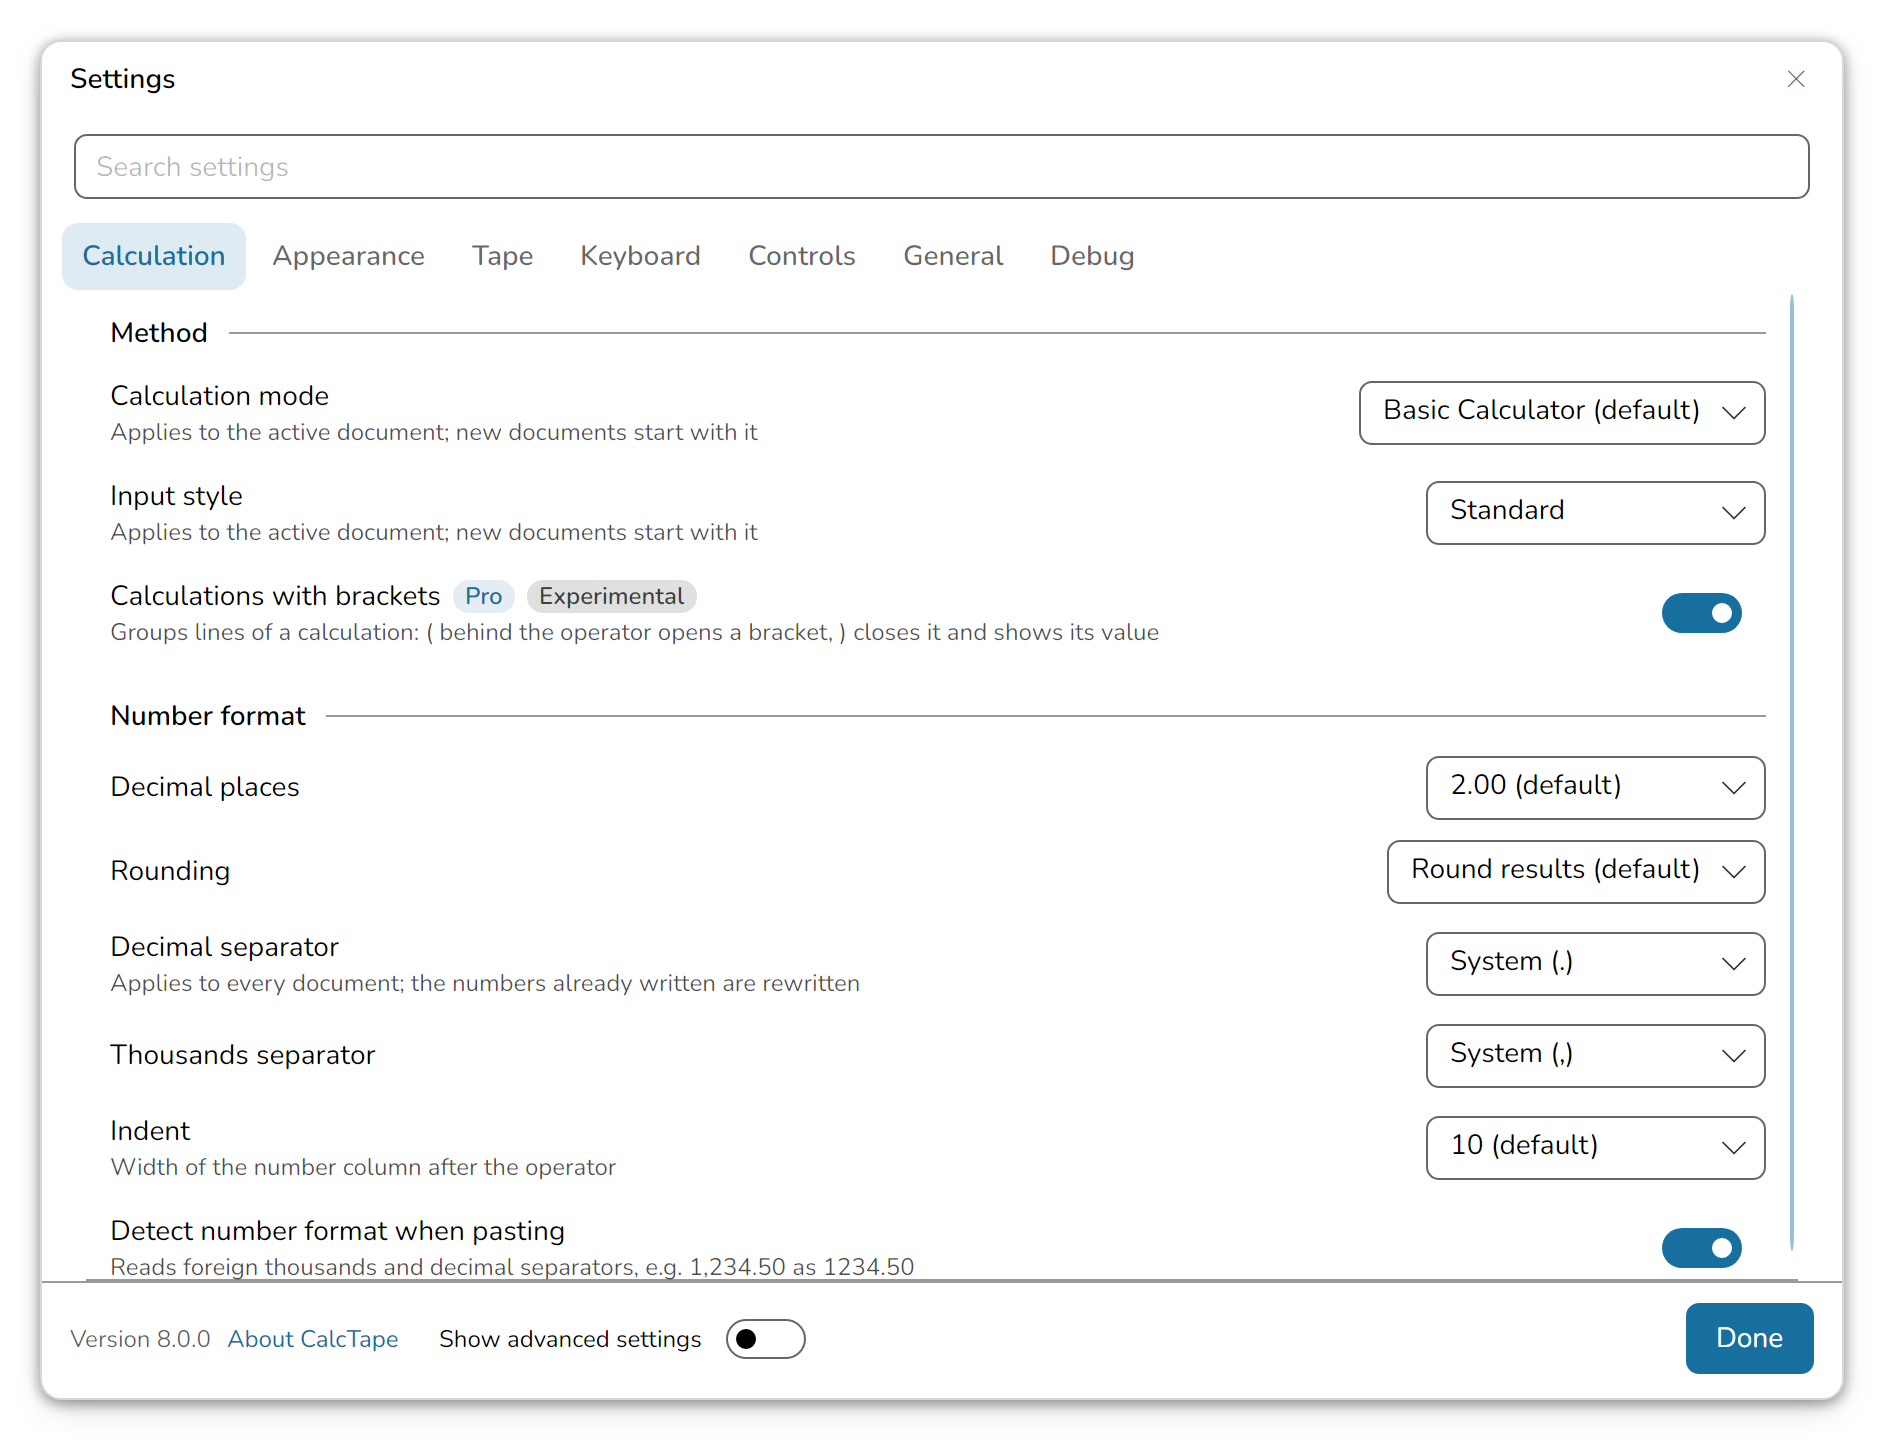
When settings open, keyboard focus starts in the search field. Tab then reaches the tabs and the fields on the selected page; Shift+Tab follows the same route backwards. Other dialogs also start in their main field, on the current selection, or on their OK/Close button.
The settings live on six pages. On each page the entries that belong together stand under a heading of their own:
- Calculation – Method: calculation mode, input style, angular unit and calculations with brackets; Number format: decimal places, rounding, separators, indent and Detect number format when pasting.
- Appearance – Design and colors: theme, light/dark, system accent color, edit theme; User interface: font size, text view font size, touch mode, system window frame.
- Tape – Font and text: font size, text font, headings and emphasis, comments first, spell checking; Lines: line numbers and markers; Calculation steps: Customize how calculation steps are displayed (section 2); Results: the result bar of the current window size and its settings. The paper underneath belongs to the theme and is set in the theme editor.
- Keyboard – Keys: keyboards, key style, key border and key shadow; Size: key size and key font; on phones and tablets, keyboard height and width (both adjustable in every orientation); Feedback: result card and key sound; on mobile devices, keyboard swiping and keypress vibration.
- Controls – Layout: Set up workspace (section 9), Contents of bars and panels with the editors for the toolbar, the ribbon, the library, the panels, the result bar and the status bar (one list per surface, a tap opens its editor), then Lists with the options for the document list, recently used, named values, example texts and tutorials. These are followed by width and height step, layout mode and Reset appearance and arrangement.
- General – Language and startup, Documents (save automatically, caret when opening, version history) and Window, on Windows also Updates; below them the experimental features (chapter 8) and Reset all settings.
Settings → Controls → Show customization commands in context menus shows or hides the commands for customizing panels and bars, setting up the workspace and switching layout mode in context menus. Row style in list context menus follows the same switch. The choice takes effect immediately and is saved per device class. The editors remain available through the settings and panel headers. The command bar’s own customization command and Restore default remain visible in its context menu. Restore default is disabled when the bar has no custom changes. The command bar selector also remains visible, allowing switching between the toolbar and classic ribbon.
Under Tape → Calculation steps → Block contrast, set the strength of the shaded calculation blocks from 0 to 100%. At 0%, the fields match the paper; 25% is the default, with lightness steps of 3 percentage points. The slider also applies to a calculation selected by clicking its sum or bracket value. It uses the middle color step. The three base colors have evenly spaced perceived lightness. The fields let 75% of the paper show through, keeping its texture visible even in nested blocks. Text on the fields keeps a readable contrast. Changes take effect immediately and are saved per device class. Customize lets you add the same slider to the status bar or toolbar.
The Lists, Calculation steps and Result bar subpages each have a reset in their footer. Calculation steps resets its switch, display modes and block contrast. Result bar resets its visibility in the current layout cell, its position and its contents.
General → Documents → Print settings and preview opens the separate print view with printer selection and preview (section 6).
The search field at the top of Settings finds entries on subpages, editors, search options and sharing formats. You can enter terms in the selected language or in English; results remain in the selected language. A result opens its destination directly. Opening an advanced result turns on Show advanced settings automatically. Other direct links to advanced rows reveal them for this visit only.
Every change applies at once; there is no OK button.
The important ones, or all of them. Out of the box each page shows the entries needed day to day. The switch Show advanced settings at the bottom left of the window brings in the rarer ones – digit grouping, angular unit, the system window frame, the key style or the row style of the lists. A heading with nothing but rarer entries under it appears only with them, such as Window on the General page. The switch is visible on every page and remembers its state. Advanced rows and their search results carry a subtle Advanced badge; unmarked rows are regular settings. Touch mode, proportional text font and caret position when opening a document are also advanced settings.
What does something instead of setting something is not in the settings: About CalcTape sits at the bottom left of the window, the Tip of the day in the toolbar editor's offer and in the classic ribbon under File → Help, Create backup and Restore backup under Backup / Restore in the command bar and in the library. The privacy policy is in About CalcTape.
System tray, sign-in and screen colors
With Show advanced settings enabled, General → Window → Show tray icon adds another way to reach CalcTape. The icon menu offers Show, Hide window, Worksheet, Settings and Exit. Minimizing keeps its usual behavior. Closing the main window keeps CalcTape running in the system tray; Exit in the icon menu ends it, with the usual prompts about unsaved changes.
Start at sign-in starts CalcTape in the system tray when you sign in. This applies to the current user; turning it off removes the startup entry. Resetting settings and restoring backups do not change that entry.
In the color picker, Pick screen color copies a color you click on the screen into the preview. Esc cancels sampling. Only OK in the color picker applies the color; Cancel discards the change.
15. Keyboard shortcuts
Every button that has a key names it in its tooltip. On the Mac the same commands sit in the menu bar with ⌘; Ctrl works there as well.
On compact Mac keyboards, fn+← / fn+→ move to the start or end of the line, as do ⌘← / ⌘→. Hold Shift to extend the selection. fn+↑ / fn+↓ move the caret up or down by one screenful.
Documents
| Shortcut | Effect |
|---|---|
| Ctrl+N | New document |
| Ctrl+O | Open document |
| Ctrl+S | Save |
| Ctrl+P | |
| Ctrl+W | Close the active document |
| F4 | Bring the worksheet to the front |
Editing (on the tape)
| Shortcut | Effect |
|---|---|
| Ctrl+Z / Ctrl+Y | Undo / redo (redo also Ctrl+Shift+Z) |
| Ctrl+X / Ctrl+C / Ctrl+V | Cut / copy / paste |
| Ctrl+Shift+V | Paste as calculation: the text is replayed key by key, and a = closes the calculation |
| Alt+Plus / Minus / Asterisk / Slash (Option ⌥ on the Mac) | Type the operator as text, for instance in the comment behind a number (section 2) |
| Shift+Enter | New line without calculating: no divider, no total, no jump below the total (section 2) |
| Ctrl+A | Select all |
| Esc | Clear the selection; close dialogs and messages |
| Ctrl+Shift+Backspace | Clear all (AC) |
| Ctrl+Plus / Ctrl+Minus | Add to memory / subtract from memory (M+ / M−) |
| Ctrl+M | Insert memory (MR) |
| Ctrl+B | Clear memory (MC) |
| Ctrl+1 … Ctrl+0 | Insert a named value – the shortcut of its value card (section 4) |
| Ctrl+click on a name (⌘+click on the Mac) | Go to the definition of the named value (section 4) |
| Ctrl+Shift+F1 … F12 | The assigned user key (section 11) |
Find
| Shortcut | Effect |
|---|---|
| Ctrl+F | Find |
| Ctrl+H | Find and replace |
| F3 / Shift+F3 | Next / previous hit |
View
| Shortcut | Effect |
|---|---|
| F5 | Switch calculation mode |
| F7 | Show/hide library |
| F8 | Show/hide keyboard |
| F9 | Show/hide user keys |
| F10 | Show/hide values and texts |
| F11 | Zen mode |
| F12 | Switch between toolbar and classic ribbon |
| Ctrl+Shift+Plus / Minus / 0 | Tape font larger / smaller / back to default |
| Ctrl+Plus / Minus / 0 in a text view | Text view font larger / smaller / back to default |
| Ctrl+mouse wheel | Size of whatever the pointer is over (section 13) |
| F1 | Manual |
| Ctrl+, (Cmd+, on the Mac) | Settings |
Opening a panel with F7 through F10 gives it keyboard focus. Closing the focused panel returns focus to the current document. F6 also returns directly from an open panel to the tape or text viewer and closes a panel popover.
F12 switches the command bar of the current width step; the toolbar comes back with its own contents.
F7 through F12 act once when pressed. Holding a key does not repeat the change. Further presses of these keys during the layout rebuild are discarded. Release the key and wait for the layout to finish before switching again.
Tabs and groups
| Shortcut | Effect |
|---|---|
| F6 / Shift+F6 | Focus the current document; within it, next / previous document group |
| Ctrl+Page↓ / Ctrl+Page↑ | Next / previous tab |
| Ctrl+Shift+Page↓ / Ctrl+Shift+Page↑ | Move the document to the neighbouring group |
Color picker (honeycomb)
In the theme editor's color picker (section 13) the Tab key reaches the honeycomb as well; a dashed cell shows where the keyboard stands.
| Shortcut | Effect |
|---|---|
| Arrow keys | Choose a cell |
| Space | Take the cell and refine around it, like a click |
| Page↑ / Page↓ | Lighter / darker – the ladder at the left edge |
| Backspace | One step back |
The settings stay reachable in any case. Ctrl+, opens them even when you have taken the gear out of the toolbar, and where no surface leads there any more the entry comes back on its own – into the ⋮ menu if the bar carries one, otherwise as a gear at the end of the bar. On a phone and on a tablet the same holds without a keyboard.
16. License and Pro features
During the trial, the license area of the status bar shows the short Trial badge alongside the Buy Pro and Choose edition links. Click it to open the edition chooser with the number of trial days remaining and the Buy Pro option.
CalcTape runs as the Freeware Edition for private use. Individual features are reserved for the Pro version – they are marked in the interface and ask for the activation code when first used.
The top of About CalcTape names the product and its version – CalcTape Pro once the Pro features are available, CalcTape Business with a Business license – and, in the Business version, the company CalcTape is registered for. Below it stands the License row: the edition and, for an activation code, whom it is registered for and, if it is time-limited, until when it is valid. The calculation core's build follows, then the rows that lead on:
- © schoettler Software GmbH leads to the team behind CalcTape.
- Support opens a message to support@calctape.com with the version and the system already filled in. If no mail program responds, CalcTape shows the text and the address, ready to copy.
- Website, Privacy policy and User manual open their page in your browser.
- Data folder opens the folder where CalcTape keeps its settings, keyboards and themes. On a phone the row only shows the path.
- Check for updates looks for a newer version. This row exists on Windows and Linux. The window stays open during the check; a message box then shows the result or a connection error.
- Differences from CalcTape 6 shows, in the window of the license terms, what the new version does differently from CalcTape 6. This row exists on Windows and Linux.
- Third-party licenses lists the open source modules in use; each one unfolds with its license text.
Tapping License opens the edition choice; the same row is under Settings → General → License. Without a license the choice offers the trial, the freeware and entering an activation code. With a license it shows the license with its activation code – Copy puts both lines of the order confirmation on the clipboard, for another device, say – plus Change code for a new code after a renewal or an upgrade, and Back to freeware. Going back asks first, because the activation code is removed from the device; you can enter it again at any time. A license bought in the store and one that comes with a company's installation package cannot be changed here.
On Windows and Linux, CalcTape checks for updates automatically at startup, at most once a week. The switch is under Settings → General → Updates; Check now checks immediately.
The update dialog shows the new version and its release notes. Install downloads and verifies the signed setup. Before starting it, CalcTape asks whether to save or discard changed documents; Cancel keeps the app running. CalcTape closes for installation; afterwards, start it with the usual shortcut. Later postpones the offer, and Skip this version applies only to that exact version. Check now offers it again.
17. Help inside the app
F1 or the book icon in the toolbar opens this manual in your browser, always up to date. The app's language decides the manual's language: German, English, Spanish or Portuguese; all other languages open the English manual. Your calculation stays open where it is. The User manual row in About CalcTape (section 16) leads there too; on a phone you reach that box through Info in the library.
Two shorter routes exist as well:
- Tutorials walk you through the most important moves step by step; you calculate along in a tab of your own.
- Tip of the day shows one trick at start – switched off in the settings if you prefer.
Still have questions? Write to support@calctape.com or back to the manual overview.